
Subaru Impreza WRX STi
|
I am back to car photography for next couple of weeks starting with new Subaru Impreza WRX STi, which looks great and drives even better! We had short notice to prepare ourselves but the result is pleasing. Location is nice, we didn't even think that we will end up in Sunseeker boat's hangar. Next ones shall be event more interesting, i have couple ideas for locations and i will be able to bring more gear along this time.

Clubbing photo guide
|
I have created simple website that contains clubbing photo guide and clubbing gallery for people who want to get in to clubbing photography and seeking advice, tips and examples.
Hopefully it will contain more info in there will be enough requests, and i am thinking of getting proper domain for it.
But for now
www.jersey.showitsite.com
Hopefully it will contain more info in there will be enough requests, and i am thinking of getting proper domain for it.
But for now
www.jersey.showitsite.com
New Website
|
I am working hard on my website using ShowIt application, which is great, simple, but surprisingly effective, and allow you to create nice flash websites, not as advanced as some software out there, but is pretty good.
Stay tuned, RW photo coming soon!!!

Stay tuned, RW photo coming soon!!!
Inspirations
|
I was scavenging acros the internet looking for for some car photography inspirations and came across this photographer, Tim Wallace, which is now one of my favourites along with Dave Hill and Ralph Lemarechal.
"Being out there shooting is where things happen..."
"Being out there shooting is where things happen..."
Mitsubishi ASX
|
Love that design, nice to drive diesel, seems very responsive and accelerates fast. Bad weather again, and that is when i am really upset because i can not afford decent portable lighting kit.
Without your own lights you need to take what is available, and usually it is not as it meant to be.

Without your own lights you need to take what is available, and usually it is not as it meant to be.

Renault Twingo Wind
|
Labels:
cars advertisment
Last week i have photographed new Renault, which is very nice small car, great to drive, it is just perfect for jersey summer days. The obvious downside it is size, but actually there was more room in the boot than in new Megane cabrio we photographed later the same day.


Lens Back
|
Finally i have recieved my 80-200 lens back. I have been cleaned on inside, as there was some dust and fungus as well. It's excellent, can't wait to go and field-test it on Sunday air race.
Jersey marathon 09
|
I just came across marathon-photos.com the website i was taking pictures for last year. Now i know the shots i have provided them with, were worth more than mere 100 pounds. Quality comes with experience.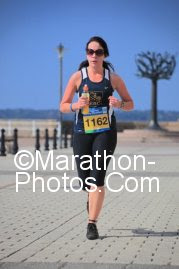

High ISO
|
Usually you keep quality in mind. Sometimes, however, there is no other option than to increase ISO.
Most of the cameras offer usable ISO up to let say 1600. As my 40D does. Sony is out of the competition and Nikon... well it's just a Nikon. Impressive how good the pictures come out on ISO 12800 on 5Dmk2.
There is grain - visible, can't miss it but overall performance is just amazing. Picture is not as pin sharp as it would be in, let say, day light, but after all you got pretty decent pictures from scene where other cameras will either cause unacceptable blur due to long exposure time or had to fire flash making everything black but very foreground.
Boxing and similar type of photography as i just realised is tough, you need to be on the side of the ring, and be lucky. Lucky to get nice shot, that means be comfortable to frame (how difficult is to focus on aligning to horizon when you need to watch out for kicks and punches), and have good timing, too. Usually you can be quick enough to take shot, but is worth to have sequence, just to get that frame of critical shot. And you need to be really careful, as they bounce against ropes, sometimes almost being throw out of the ring so be aware what is going on.
High ISO with hi frame rate combination gives a lot of photos to choose from, and that might be time consuming. Delete all photos with bad focus, without some good alignment, and without some sense.
You just need to be lucky and quick enough to capture something outstanding.
I like this shoot a lot, first few seconds of 5th round, kick when you wet cause all the water drops fly in the air. I remember seeing that in some boxing photography and i liked it. Now i have got my own one, first to start with.

|
Today i have taken my new lens to work for my friend to look at, i just can't wait to try it on assignment!
I have 100 f/2.8 lens, but 80-200 f/2.8 it's just something wonderful. Maybe this sunday, moto-X at Sorel Point.


|
I just bought second hand EF 80-200 mm f/2.8L lens, and therefore replaced my EF 70-200 USM f/4L.
Lens it's quite old, perhaps 20 years or so, but build quality is just stunning, like current L series, but for about thousand pounds less. I am not using this type of lenses often, so this is good replacement, at actually no cost to me. Usually the newer the better, but i will now sell my few year old lens and stick to that great one!
Lens it's quite old, perhaps 20 years or so, but build quality is just stunning, like current L series, but for about thousand pounds less. I am not using this type of lenses often, so this is good replacement, at actually no cost to me. Usually the newer the better, but i will now sell my few year old lens and stick to that great one!
Back on rock
|
It was nice, but now there is time to get use to the gray reality. Again.
Some photoshoots coming soon, when there will be a little warmer, or some experimental macro studio shots if i i will have some time. Now waiting for new iMac to be released (updated) so i can get one.
And btw, i am inspired by Dave Hill photography again, he is great in what he does. Respect.
I wish i could shoot with him one day. Will see.
Holidays
|
I will be going for 2 weeks holidays, maybe i will have some time to get some shots in liverpool where i will be staying for 2 days in total, and back home. But its to cold to walk about with camera in hand.
Ultimate clubbing photography guide
|
Ultimate clubbing photography guide
=====================
.jpg) Summarizing you need some sort of DSLR camera capable of high ISO, with manual controls (Are there any without?) flash mount. That is it. Plenty to choose from. But think what else you could be using it for.
Summarizing you need some sort of DSLR camera capable of high ISO, with manual controls (Are there any without?) flash mount. That is it. Plenty to choose from. But think what else you could be using it for.
.jpg) Summarizing your lens would ideally some sort of wide angle, aperture around 4 or more will do, reducing costs, and no stabilisation is needed.
Summarizing your lens would ideally some sort of wide angle, aperture around 4 or more will do, reducing costs, and no stabilisation is needed.
.jpg) Summarizing you can get any flash as long as it tilts and swivels, get some rechargeable batteries with it and some light diffuser.
Summarizing you can get any flash as long as it tilts and swivels, get some rechargeable batteries with it and some light diffuser.
.jpg)
.jpg)
How to set the camera?
That is one of most difficult task. I will try to make it easy. At this point we will have to assume there are two types of light. Ambient and flash, and them two will be controlled independently. Let say, there are four type of photographs you can get in night club, but there is only one you actually want to achieve, but occasionally you will get other result out of other three.
.jpg)
Second one - background exposed correctly (let say it is as for the night club) and foreground underexposed (this happens quite often if subject if wearing white or bright cloths, you will learn how co sort it out later)
.jpg)
Third one - background under exposed but foreground exposed ok. That sometimes might be the only option, but id does not look much better than taken with compact camera, comparing in general..jpg)
Fourth one - the one you will like to get most of the time, nicely exposed background and properly lit foreground..jpg)
How to set the flash?
.jpg)
.jpg)
.jpg)
.jpg)


Photographing in nightclubs is totally different story than any other type of photography, due to lighting, which usually is not constant. Lighting is the key here. If you are beginner you would set camera on auto or P and let it take a snap. Unfortunately, at this time you have to decide how you want pictures to look, not the camera. You will be working in M mode practically all of the time as there is nothing more frustrating than camera trying to adjust something to make it better, where it actually does not, and that usually ruins the shot. Lets get started.
Part 1
preparation
What to use?
Which lens?
Which flash?
What else?Part 2
Practice
How to approach?
How to set the camera?
How to set the flash?
If that is already mastered?
=====================
Part 1
Preparation
What to use?
First at all, you need camera, that is DSLR. It seem quite obvious, but i have seen some people actually trying to use some bridge cameras. Sorry, it is not going to work. In these days this cameras are cheaper, better, more affordable and more advanced. If you want to buy one - simply get a Canon. That's what i use. That's what most of the professionals use. For a reason. You may be tempted now, but will regret later. I am not saying that Canon Cameras are better than the other (but you must admit - more pros than cons to go for Canon), it is your initial choice that will then allow you to buy loads of accessories, which are most common for most common cameras. Also second hand stuff, more to choose from.Depending on your budget, you can buy cameras that wary in build quality, but are very similar in picture quality across the range (Canon), or have higher build quality across the range but quality vary a lot (Nikon). You will find many cameras with Full HD video recording, which is handy feature, and also nicely shows how powerful is the processor on the camera, which must handle 1920x1080 video (Canon) and how much it struggle even with 1440x720 (Nikon). You don't need fast frame rate, but it might be handy on some other occasions, you will not have only one camera for clubbing (at least for now). Higher maximum ISO is better, because usable ISO will be high as well. You don't need high ISO at all the time but it is handy to have it when you need it. And you will, quite often. Mpix resolution is entirely up to you. It is handy to crop, if you need, or if you are shooting for the website you can reduce picture size.
.jpg) Summarizing you need some sort of DSLR camera capable of high ISO, with manual controls (Are there any without?) flash mount. That is it. Plenty to choose from. But think what else you could be using it for.
Summarizing you need some sort of DSLR camera capable of high ISO, with manual controls (Are there any without?) flash mount. That is it. Plenty to choose from. But think what else you could be using it for.Which lens?
This is very tricky question. You may assume that faster lens (smaller f/ number) is better. Few years back i thought so, too. In fact you don't need any f/1.4 or similar, simply because they are primes. And as you could imagine, in crowdy night club there might be no room to step back to get some in frame. So that means you will be ideally looking at some zoom lens. They come in many varieties and flavours, as well as with fast aperture or/and image stabilisation. In fact you don't need it at all. As we all know smaller aperture gives us shallow depth of field, which may be bad if you are trying to get group of people in shot and they are not in perfect line (and you are not in front of them exactly). Is nice for weddings and portraits where you can somehow prepare shot, but at the party where is a lot of buzz and Ferry Corsten is on decks not many people will want to prepare for the shot, pose, focus, and make it easy. Lenses with aperture 4 to 5.6 should be best, as they give reasonable depth of field, are not so expensive, and with good camera you can boost up ISO to compensate smaller aperture opening. Image stabilisation systems are not useful, simply because your exposure times quite often will exceed times where those are effective, and also way you will handle your camera will not help with stabilising image; actually you dont need to stabilize, later you will see why.
.jpg) Summarizing your lens would ideally some sort of wide angle, aperture around 4 or more will do, reducing costs, and no stabilisation is needed.
Summarizing your lens would ideally some sort of wide angle, aperture around 4 or more will do, reducing costs, and no stabilisation is needed.Which flash?
This is quite straight forward. Any with the tilting/swivelling head. You don't need most powerful one as you will not fire it straight 50 meters or so as it should be, you will try to diffuse light by either bouncing it off the wall or/and celling or by using diffusers. Some flash guns recharge faster than the others, but is not critical to have fastest one, but it obviously have some advantages. All Flashes use AA (LR6) batteries, so you will have to get yourself some fast battery charger, and high capacity Ni-MH, preferably two sets, or one lithium (non rechargeable) as back up. Lithium batteries last for quite a while compared to alkaline (although i used some, sometime, and it wasn't that bad) but rechargeable are ones to go for.
.jpg) Summarizing you can get any flash as long as it tilts and swivels, get some rechargeable batteries with it and some light diffuser.
Summarizing you can get any flash as long as it tilts and swivels, get some rechargeable batteries with it and some light diffuser.What else?
As you have your core kit ready to go, you just need memory cards. Usually any will do, but if you are shooting RAW (if you need to) try to get some faster type card, class 6 on DS/SDHC/SDXC or 30MB/s CF. Brand of choice is SanDisk. Reliable and well worth the money. But work as any other card, if work. Essential, for me, is filter on my lens. Could be UV, if you must you can use skylight filter although it add some pinkish colour cast (but there is no much problem since cameras have white balance on them) or just simple clear protector. Is nothing worst than pushing lens against some rough surface, corner, glass, anything that could possibly damage it or scratch, or just against fingers and other body parts which may get in contact with it. If you have some basic lens, like kit 18-55 you can put anything on it, it does not really matter. But if you are using expensive lens, you better consider something good, what is the point of attaching cheap plastic-like filter in front of your precious top end lens? Brand of choice is Hoya, especially its HD series. Toughest filter you can find around, it stays in one piece where other get shattered. Just in case of extreme situation. As you have been in to club yourself, probably many times, there is risk of getting dirty, wet, pushed in to something or someone. Your camera will wear out on outside, and you will see all that dirt in your's camera corners. You may consider something like Camera Armor, which is basically rubberised wrap that goes around your camera and protects it from bumps, scratches and dirt. Really handy in crowded clubs. For your flash, you will need some diffuser, many to choose from, but most of them is omni-directional, and we need something that gives light to the front rather to the back (in most situations), that could be easily fixed, so get anything you feel is good. I am using sto-fen diffuser, but if i had a choice, i would choose something with slightly larger/wider diffusing area. And the last thing is the bag. Avoid big shoulder bags, as they are not handy when comes to squeezing trough narrow hall, try to get something like small sling back pack, that works best. It just need to fit your camera and lens, flash with diffuser, batteries, spare batteries, memory card and spare memory card (never forget those, is very frustrating when you forget your main card, and there is nothing else in your back pack, you walked all way down for nothing).
Summarizing you also need filter, spare batteries and cards, practical bag, and maybe Camera Armor.
.jpg)
.jpg)
.jpg)
Part 2
Practice
How to approach?
Generally you will meet many different people, so there is no universal way to speak to them, but eventually you will find out how to talk to these people, you just need to keep in mind that they are out because they want some fun. Try to be nice, keep in mind that is your job, but don't be serious, it is bad place to be serious. Have fun with what you are doing, after all is the photography you so love. When talking to somebody try to talk like to your friend, assume that you know each other already. Ask if the party is good, if they are having fun or just tell them to get together so you can take a shot. Quite often you will be asked by some people to take pictures, and usually people nearby ask you as well, if they see you taking photos. You may end up in situation that people fill be almost queueing for you to take some shots. Some will be rushing you, try to pay attention to order they have asked you in. If someone annoys you, because is abusive or so, just try to ignore them, they eventually go away. Usually drunk people try to get you to get picture of them doing something stupid. Just refuse and ignore them, they will quickly forget about everything anyway. If you see someone taking photo of friend or friends, try to get the same photo as well! It is really good opportunity to get really nice fun shots. In general, if you see something interesting, try to take shot. Shoot first, then ask questions (sound familiar? It work similar way here).
Summarizing try to approach people in friendly manner, they are there for fun, so make taking pictures fun for them, as well as for your self.
How to set the camera?
That is one of most difficult task. I will try to make it easy. At this point we will have to assume there are two types of light. Ambient and flash, and them two will be controlled independently. Let say, there are four type of photographs you can get in night club, but there is only one you actually want to achieve, but occasionally you will get other result out of other three.
First one - you will get underexposed background as well as underexposed foreground/subject (if we can say that, there is no way you could get proper exposure in club, in terms of camera auto metering or trying to achieve perfect histogram).
It look like that
.jpg)
Second one - background exposed correctly (let say it is as for the night club) and foreground underexposed (this happens quite often if subject if wearing white or bright cloths, you will learn how co sort it out later)
Example
.jpg)
Sample
.jpg)
Good shot!
.jpg)
Because clubs have many lights which move constantly around, you will not rely on cameras metering (at least not as much) you dial setting of choice ought be M (manual). It may seem complicated when you are entering photography world, but sooner you get used to it, then better. Remember as i mentioned usable ISO on camera earlier? Usable means high but with still decent quality. I am using ISO 800 to 1600 most of the time. In well lit club you use something like 800, see fourth example, but if the club is rather dark, use higher ISO, to get as much light out of the background as possible.
One of the most important things about getting photos with nice colourful background is how you position yourself against subject. They don't care, but if you have chance, ask them to move to other spot, or you go around to get some fancy lights in the background. This is very important and regardless of the camera settings it will add impact to your photographs.
If there is not much light available, there is not much you can do, really. You can't add much light in the background, so try to reposition, or if that is not possible, try to move close to the wall - it is better to have some colour or patterns as a background than plain black space.
Tricky is to set correct exposure time. Let's all assume we will be using aperture of f/4 most of the time. Good overall ISO is 800, and it also help to extend flash battery life, because flash don't have to be as powerful to get same result as with ISO 100. From my experience i would say exposure time around 1/10 of second. This is where many people fail, because using P, Av mode, or full auto, takes the picture with relatively fast shutter speed, in auto or P camera set time to 1/60 automatically which is inappropriate. On Tv, however, we can select desired exposure time, and camera will adjust aperture to existing light condition, that usually means maximum aperture of particular lens. That is why most reasonable is to set it to M. Be careful with lenses with variable aperture, ie. f/3.5-5.6 because if you set aperture f/3.5 as soon as you zoom in camera will automatically change it to lowest opening for that zoom position, which is, on maximum zoom, f/5.6 in this case, so to avoid camera messing up your aperture setting (either in M or Av modes) always set your working aperture the same as highest number of minimum aperture (which is written on the front of the lens).
Let assume your settings look like this: f/4 1/10th ISO 800.
Now we need to set few more parameters, another important one is WB (white balance). Because we will be using flash, set it to flash position, and avoid AutoWB because all those lights in club will make it go crazy. There is only one exception to this, when you may want to change it to WB wor a while, when you rather in bar area of the club where strong ambient lights shines on to the subjects and there is no way to move around, so to get some lights in the background (if any) you want fairly long exposure time, but because object is lit, too long will blur its face, so you have to find sweet spot, but also it will mix with flash light and the colour temperature will not be the same light for flash itself anymore, so if you will leave it on flash WB you will get bad orange colorcast which it might be unacceptable. Try to keep it most of the time, and alter shutter speed if it will mix up with flash light too much.
By increasing or decreasing exposure time, you control ambient light, which, in right set up, is the light in the background, not directly shining on to the subject. Ideally there will be very little ambient light in foreground, and much more in the background. that way you can create very pleasant results.
Some examples showing same scene with three different exposure times. Notice, that slightly longer usually gives more attractive results.
1/30 1/10 1/2
[pic][pic][pic]How to set the flash?
Now you should know more or less how to control amount of light in background by increasing or decreasing exposure time, depending on how many and how intensive these lights are. It is worth trying few shots (as shown above) to work out best times for particular venue.
Now i show you how to use flash with it. It is not as easy as setting everything to one setting where no automation is involved. It's rather tricky to set flash manually and adjust its value as easy as with exposure time, so we will use old good ETTL II (or TTL for other cameras) to work out how much flash power do we need. Most of the cameras can measure frame and get reading in at least 3 ways:Evaluative, spot or average. Normally it is used to determine exposure settings, but now, when we work in M it will just get us settings for flash. We will not use evaluative simply because it analise entire frame, and because camera see dark background it will try to compensate with stronger flash than required. Spot, on the other hand is sometimes problematic when someone wears dark clothes, it will overexpose as well. We set our camera to average (center-weighted) or some cameras feature central spot (which is like spot, but of larger area which should be enough) that is good option too. Great. Now our camera get light reading from area of our interest - our subject, not the background.
As i mentioned earlier, camera can get confused, and it might under or over expose our subject, event if we get our settings right. It is because different materials have different reflection index, and camera will get confused. Most annoying you may encounter is person wearing something white, that is dominant in photograph. Most of the time camera will read it wrong and underexpose is. That is why you need to know Flash Exposure Compensation option on your camera, because you will use it almost as often as exposure time. Simply, if you see person wearing white shirt, just push it that flash will be stronger, by one or two stops. Each camera is different in this matter so you need to try few times. For example, my 40D requires to me constantly -1/3 because on 0 pictures bit overexposed, but 5dmk2 need +1/3 or 2/3 because it is just to dark. Practice it.
Flash exposure compensation
.jpg)
Now you know how to adjust background to your needs, and how (in theory) flash need to be set. There are three more things you need to know about your flash - how to position it, which mode it should use and how to focus. Positioning greatly depends on type of difuser you have, but generally accept that if there is white wall or celling right next to you or behind, you can rise head almost vertically, but if there is no ceiling because its big high club, or it is black or dark coloured, then set it to 45 degrees forward. As mentioned earlier most of the diffusers are omni-directional that means they will send some light behind you as well as to the sides, but unless you have wall close to you behind it is just waste of power in vast club space. See the last picture below, to find out how to partially prevent this light loss (or get some other diffuser as i can show you sto-fen, the only one i have).
Pictures of flash settings mentioned before:
.jpg)
.jpg)
.jpg)
Flash can operate in 3 different modes:
Normal, High speed, and slow sync. Most of the time, because we will photograph with long exposure times, we would like to set it to slow sync mode. Below examples of shooting with slow sync and without (with long times):
Without
[pic]With
[pic]And focusing, which is as important as everything else, it is done pretty much automatically, thanks to build in flash AF assist beam, which as the name implies will transmit beam of light to support focusing system. Now you need to be aware of which focusing point to use. On large groups of people you can use auto selection, which pick focus which repeats most out of all points available, but sometimes you may want to change it to central point, for accurate focusing, ie. when there is to much background visible and camera tend to focus on the background. You select central point, then focus on object you want, if it is not exactly in the centre, you can tilt camera a little bit, focus on ie. face and then rearrange frame and shoot. Because its dark, try to use central point as it is more sensitive than the others (camera dependant).
And that is about it, mastering these settings, or rather balancing them correctly shall give you very interesting results. Every place is different, but try to start with your preferred settings and adjust them accordingly. Now you should be able to get something like this, opposed to the other one:


If that is already mastered?
Over the time i have developed some variations to schemes show above. If you have custom settings (C1,2,3) on your dial, set them to most used settings, that is very handy. Also, because we lack shallow depth of field sometimes (however sometimes it is not desired) there is something we could add. During the exposure, which is as we previously stated around 1/10, we can move camera, but that usually causes unwanted blur. Just make it wanted by knowing how to move your camera. One of the best tricks is to rotate camera slightly during the exposure, along the lens axis. This shall produce pleasant blur which add some impact to pictures. It is commonly called radial blur.
[pic]
Other option is to zoom in or out (but zooming out does not give nice results but you are welcome to try) during the exposure. For that you would like a bit longer time. Trick is to zoom out first, focus and keep it locked (shutter pressed half way) and then zoom in. Then press the shutter button completely and zoom out to the end (it could be any zoom setting, but its hard to stop at the same value as you have set focus on which may lead to foreground blur, especially on full frame cameras). That way you have created zoom blur effect. Now there are two important things about it. First, as you may realise, picture will be over exposed. Its because you zoom on to darker (usually) part of the pictures, and camera tries to compensate that by increasing flash power. You just simply need to reduce it's power by -2/3 stops. Job done. And another thing is to get some lights in background that can actually blur, because shadows cant blur (well, maybe it they can, but). Also try to avoid lights right in the middle, just in between two people, as they will cover the faces as you will zoom out. When you gett everything right, you should get something like that (also you can rotate camera whilst zooming out, combines both, second picture):
[pic][pic]
I hope that this quite long guide (it was intended to be short, believe me) will help you or teach you something new.
I wrote it, because when i was starting, i couldn't find anything good enough on clubbing photography, and as looked
now, there is still not much information on it. I believe it may become handy for some.
If you have extra questions please let me know. And leave coments if you liked it!
Rafal
Update to forthcoming projects
|
I just remembered what i actually want to do this year, i really want to find some time and realize my project where i will show jersey as a different place, let say Chicago's suburbs. But it getting cold now, nothing i can think of but warmth of my house. another one its to spare some time for models and get some nice portfolio of it. In fact, fashion photography is one to go for. And i want to do something about macro world as well this year. Including water drops as i have got my laser trigger to be used with mains. Cool.
2010
|

Subscribe to:
Comments (Atom)
